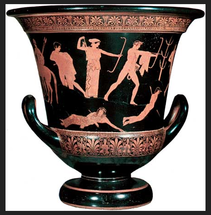
Classic Red-Figure Pottery
Fragments of Antiquity: Examining, Classifying, and Creating Greek Pottery
GRADE LEVEL: 6th grade TIME NEEDED: 3 - 4 periods
OBJECTIVES: Students will develop an understanding of archaeological methods of dating artifacts in a lesson based on
aesthetic understanding of Greek pottery decorative styles. In this lesson, students will:
• develop an appreciation for the creativity, artistry and variety of ancient Greek pottery design
• identify characteristics of how the human figure is depicted (compared to Sumerian and Egyptian styles).
• examine images Greek pottery to identify characteristics of five major decorative styles.
• learn about one distinct historical period of Greek pottery design:
archaic
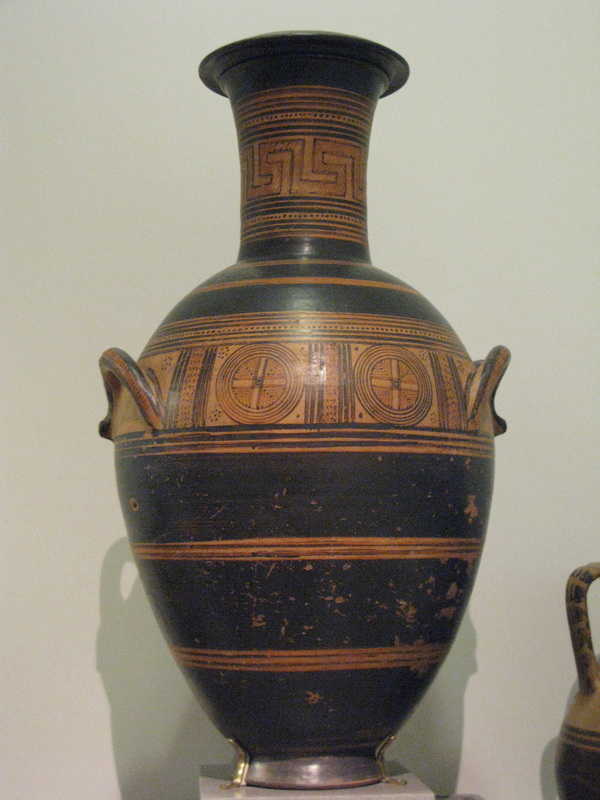
geometric
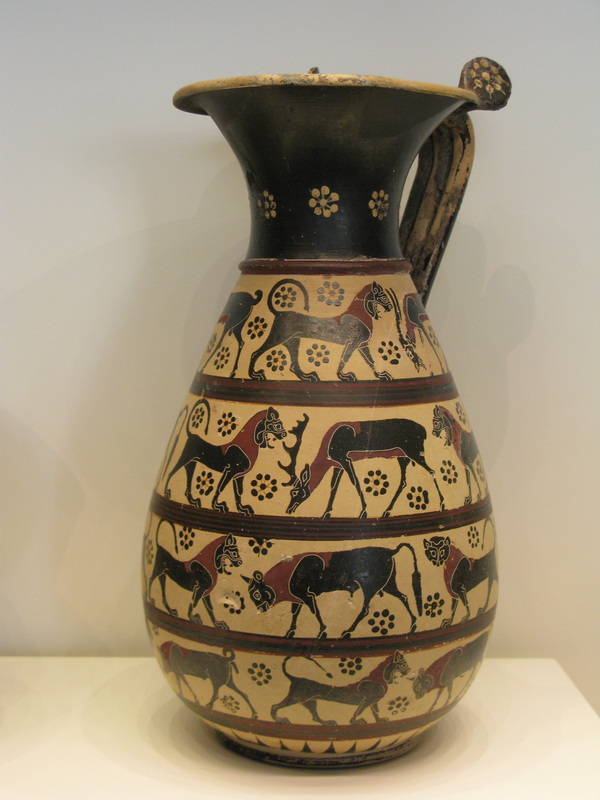
orientalized
black figure
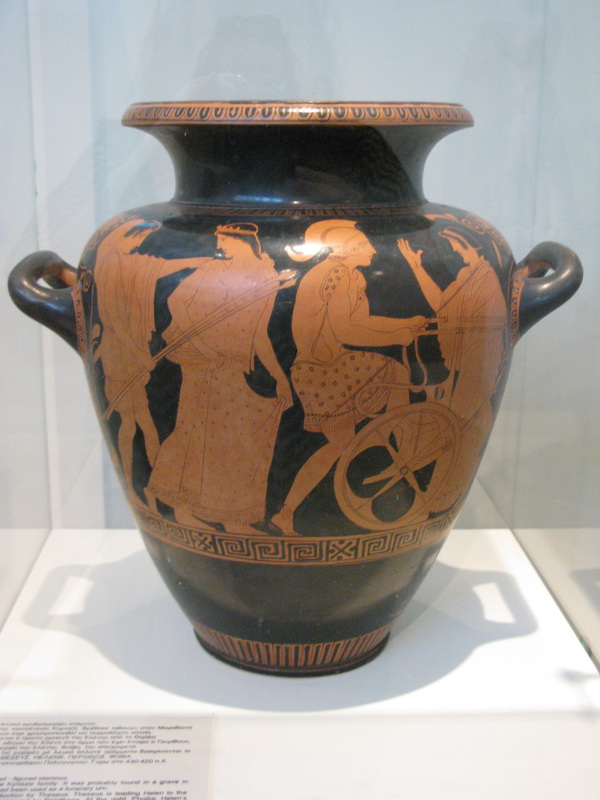
red figure
• closely re-examine the five styles in “expert” groups
• consider historical context and how Mediterranean trade influenced Greek pottery decoration
• record their observations on a classification chart.
• create a pottery fragment in one representational style
• sort and reclassify classmates’ pottery shards by style as amateur archaeologists
BACKGROUND:
Because pottery was the most widespread of crafts in ancient times, it is the most frequently excavated material found by archaeologists. Though easily broken, even small fragments can provide valuable clues that date discoveries. The artfully painted black and red pottery of the ancient Greeks is especially valuable to historians, because of their detailed paintings. By depicting scenes of everyday life and mythology, these artifacts provide a wealth of information. For more than a thousand years, pottery from mainland Greece was traded and treasured throughout the Mediterranean world. Reflecting the influence of seafaring trade, especially with the Middle East, decorative styles changed over the centuries. From the early Mycenaean style of the late Bronze Age to the widely recognized black figure and red figure pieces, the painted decoration can be classified into five categories that correspond to periods in history.
GRADE LEVEL: 6th grade TIME NEEDED: 3 - 4 periods
OBJECTIVES: Students will develop an understanding of archaeological methods of dating artifacts in a lesson based on
aesthetic understanding of Greek pottery decorative styles. In this lesson, students will:
• develop an appreciation for the creativity, artistry and variety of ancient Greek pottery design
• identify characteristics of how the human figure is depicted (compared to Sumerian and Egyptian styles).
• examine images Greek pottery to identify characteristics of five major decorative styles.
• learn about one distinct historical period of Greek pottery design:
archaic
geometric
orientalized
black figure
red figure
• closely re-examine the five styles in “expert” groups
• consider historical context and how Mediterranean trade influenced Greek pottery decoration
• record their observations on a classification chart.
• create a pottery fragment in one representational style
• sort and reclassify classmates’ pottery shards by style as amateur archaeologists
BACKGROUND:
Because pottery was the most widespread of crafts in ancient times, it is the most frequently excavated material found by archaeologists. Though easily broken, even small fragments can provide valuable clues that date discoveries. The artfully painted black and red pottery of the ancient Greeks is especially valuable to historians, because of their detailed paintings. By depicting scenes of everyday life and mythology, these artifacts provide a wealth of information. For more than a thousand years, pottery from mainland Greece was traded and treasured throughout the Mediterranean world. Reflecting the influence of seafaring trade, especially with the Middle East, decorative styles changed over the centuries. From the early Mycenaean style of the late Bronze Age to the widely recognized black figure and red figure pieces, the painted decoration can be classified into five categories that correspond to periods in history.
PROCEDURE:
Preparation
Gather examples of five pottery styles from web images, postcards, and books, Two or three of each style is sufficient.
Collect broken pottery shards from the local nursery. Usually they can be obtained for free. Select unglazed terra cotta.
Supplies: pencils
medium & fine tip black marking pens (permanent ink markers)
white drawing paper for tracing shard shapes.
five 8 1/2" X 11" pieces of paper labeled Archaic, Geometric,Orientalized, Black Figure, Red Figure
Handout for each group with background on about one decorative styles (attached)
“Pottery Classification Charts” for each student (attached)
Pre-activity focus:
During the study of ancient Greece, students may have noticed examples of Greek pottery on film, online, or in reference
materials in the classroom. Encourage students to carefully study the images. Elicit observations about what they can tell
about the culture from what they see. Compare and contrast with artistic style used in ancient Mesopotamia or ancient
Egypt.
Activity:
Have students sit in five table groups. Tell them that they live during five different periods in Greek history, roughly one
century apart. Designate each group to be one of the following: Archaic, Geometric ,Orientalized, Black Figure, and Red
Figure. Put “placemat” labels on the respective tables and distribute sample packets to each group. Tell the class that they
must first act as detectives. Direct them to examine their photographs; describe what style of painting is seen in their
images.
At first this will be difficult, but encourage them to verbalize any of the details they notice. After a few minutes, suggest
that the activity will be “so much easier” if they see how different their pottery is from other groups in class. Invite all
students to walk to the other four table groups to survey the images. Upon returning to their “home groups,” they
should be able to describe characteristics more easily. Assist groups as needed. (“What do you see here?
What is this? How would you describe this border?”)
Give mini-lecture on the importance of pottery to archeologists due to it’s prevalence in virtually all excavated sites.
Describe how styles now as well as in ancient times can easily “date” artifacts. Tell them that their photo images would
be important archeological clues if such pottery or fragments were uncovered. Ask students to give examples of how
styles change (quickly today!) but focus on how trade and communication creates change.
Distribute classification charts and ask students to describe as completely as they can the techniques, images, border
designs, and overall “style” of their group’s images. Write down their observations. After they have finished, give each
group a card with written information about their styles. Have groups read, discuss and add new information to their
charts.
Distribute broken pottery pieces and white drawing paper to each student. Tell the class they will make archaeological
artifacts “in the style of” their time periods. Each student should trace the outline of his/her shard.
Students should choose “a section of” a vase or plate shown in one of their group’s images. In pencil carefully draw the
design (on paper outline) to practice what the fragment will look like. If successful, draw the image on the shard. Use black,
permanent ink marking pens to color in black lines and black areas. (Afterwards use a mixture of white glue and water on
the shards to “fix” the design).
When students are finished, create a display of the five styles at the table groups. Have the class walk around,
in a “Silent Gallery” activity, to re-examine the five styles. Focus their attention on the unique decorative qualities of
each style.
Students return to their five table groups. Groups select one student to be the spokesperson for each group. Review
the characteristics of the five styles within groups. All students complete chart for “their” style. The teacher may need
to give added information as needed to help the Archaic and Orientalized groups.
Do a “jigsaw activity” where rotating expert teachers go to the other four groups with their photo images to teach
classmates. All students complete their “Pottery Classification Chart” as each expert gives information. When
experts return to home groups, fellow group members assist them in completing their charts. If you do this activity
with several classes, subsequent groups can see and “classify” pottery shards by style.
ASSESSMENT:
• Completed classification sheet can be assessed (optional)
• During the next class period, each student will get one shard (preferably from another class) to identify. Write
a short description of the characteristics and time period of the piece based on classification chart.
• Alternative assessment: Have three pieces (A, B, C) for entire class to identify by style.
• Have students go online to collect examples of all five characteristic styles. Summarize observations.
ADDITIONAL ACTIVITIES:
• Create a “mini-dig” where pottery fragments are discovered. “Date” the site using archaeological methods of shard
identification.
• Mix all fragments and have students classify by style.
• Create linoleum block prints using Greek pottery shards as inspiration.
• Illustrate a scene from a Greek myth (in the style of one of the five categories) on terra cotta-colored construction paper.
• While studying Greek mythology, students create pottery shards using the iconography of a particular god or goddess.